Simple downtime alerts for your Rails app in 5 minutes
How do you know your Rails app is still online? How do you know it’s not displaying some error? That’s what monitoring is for. If you look around you’ll find lots of solutions. Most of these solutions are overkill if you are just starting with Rails servers or if you only have a few applications.
What is important when choosing a monitoring tool?
1. It should be a hosted solution
If you have to install and maintain it yourself you need another monitoring tool to monitor the monitoring… Yo dawg… And hosted solutions provide features that are really hard to maintain by yourself, like monitoring from multiple locations and sms messaging.
2. Notifcations
You need some kind of notification that you will notice immediately when it comes in. So if you disabled notifications for email on your phone you need something else. For me SMS (text message) works great because nobody in Europe uses them anymore. A smartphone App with customizable notifications is fine too.
3. Simplicity
A lot of monitoring tools are too complicated and have features you’ll never use. And maintaining all these features often makes them expensive. You more prone to make mistakes setting things up if the interface is more complicated. Monitoring tools should be simple and have a reasonable pricing structure.
My favorite: updown.io
Updown.io is definitely my favorite. The interface and the pricing structure are really simple. But it still has all the features you need in an uptime monitoring tool. It even checks ipv6 adressess. It does not have a monthly cost but you buy credits, and every check costs a credit. You get 100.000 credits to start with. Which is enough to check 1 app for a year at a 5 minute interval.
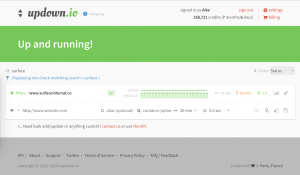
It has a nice status page that you can share with a client or put up on a tv-screen. You can even put it on your own domain: status.runrails.com
You can obviously use updown.io for WordPress and other sites as well. But since this blog is about Rails it’s worth mentioning that it has a Ruby Gem.
 <figcaption id="caption-attachment-60" class="wp-caption-text">updown interface</figcaption></figure>
How to setup updown.io
- Go to updown.io, sign up and verify your email address.
- Login and go to settings to add your phone number if you want to receive text messages.
- Now it’s time to add a check, go back to the main screen and select “https” in the first column. If you monitor your app through “https” you will get notifications when your SSL certificate is about to expire.
- Put your url in the second column, for example: “www.runrails.com”
- Adding an Alias is optional, I usually put in a short description like “runrails website”
- Contains is also optional, but useful. If you enter a few words that are displayed on your site updown.io will check for them. I’m going for ‘Ask me a question!’ because that’s on every page and it definitely won’t be shown when the site is down or giving an error.
- Check Interval: I usually go for 5 or 10 minutes when monitoring for uptime, and for 1 hour when I only care about the SSL certificate.
- Apdex is the response time of your app or site. If your site suddenly becomes slow, updown.io will notice and send you and alert. I usually go for the 1 or 2 second values because I only want an alert when an app is really slow.
- You can leave the other options at their default settings.
- Click the save icon to save your site and start monitoring.
Now don’t worry if it doesn’t go to green immediately or shows status “UNKNOWN” for a while. That is normal for the first hours.
Optional settings:
- Enable the checkbox for “SSL expiration notifications” if you want to receive email notifications for SSL certificates that are about to expire.
- Add email addresses of your colleages or clients in the “
- Connect your teams Slack Channel.